> ## Documentation Index
> Fetch the complete documentation index at: https://docs.tess.im/llms.txt
> Use this file to discover all available pages before exploring further.
# Creating a Digital Employee
> Hire with /hire in the Omnibar or with the full Open position form
## Overview
A **Digital Employee** is an autonomous agent that runs work for your team. In Cowork you can create one in two ways:
1. **`/hire` in the Omnibar** — describe the role in natural language; Tess configures the employee for you (fastest).
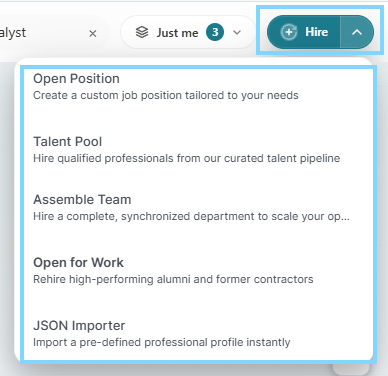
2. **Hire → Open position** — the full **Hire** form where you set identity, work instructions, Work Mode, Work Cycle, and Advanced settings yourself.
## Prerequisites
* You are in Cowork (Mesh Canvas)
* Your workspace has credits to run employees
* You can hire Digital Employees in this workspace
## Option A — `/hire` (Omnibar)
### Step 1: Start the command
Click the Omnibar at the bottom of the canvas, type `/hire`, then describe the role — for example: `/hire someone to monitor competitor pricing weekly`.
 `/hire` does not open a field-by-field review form before submit. For full control, use **Hire → Open position** instead.
### Step 2: Watch recruiting progress
After you submit, Cowork shows a short recruiting animation while the employee is configured. You cannot edit fields during this sequence.
`/hire` does not open a field-by-field review form before submit. For full control, use **Hire → Open position** instead.
### Step 2: Watch recruiting progress
After you submit, Cowork shows a short recruiting animation while the employee is configured. You cannot edit fields during this sequence.
 ### Step 3: Employee appears and first run starts
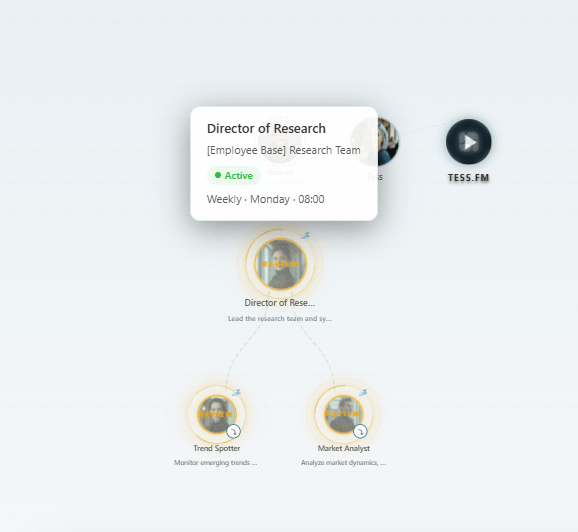
When configuration succeeds, the new employee node appears on the Mesh and the first run usually starts. In Supervised / plan-based modes, you may need to [approve the first plan](/en/cowork/digital-employees/aprovacoes-e-interacoes/approvals-interactions) in the drawer before real work continues.
### Step 3: Employee appears and first run starts
When configuration succeeds, the new employee node appears on the Mesh and the first run usually starts. In Supervised / plan-based modes, you may need to [approve the first plan](/en/cowork/digital-employees/aprovacoes-e-interacoes/approvals-interactions) in the drawer before real work continues.
 If hiring cannot finish confidently, you see a warning instead of a new node — rephrase with clearer tasks, cadence, and constraints.
### What `/hire` typically sets
| Area | Behavior |
| --------------------- | ----------------------------------------------------------------- |
| Name & personality | Inferred from your text, or sensible defaults |
| Goal | Short goal text when your request implies one |
| Work instructions | Expanded operating guide from your request |
| Work Cycle & timezone | Parsed if you mention timing; otherwise a default + your timezone |
| Model | Only if you name a model; otherwise platform default |
| Credits limits | Only if you mention a budget; otherwise none |
| Connectors | Only if your text implies integrations you already connected |
`/hire` does not attach knowledge-base documents you did not imply.
## Option B — Full Hire form (Open position)
1. Click **Hire** → **Open position** (or double-click empty canvas when that shortcut is available).
2. Fill **Identity** (avatar, name, voice, optional Goal).
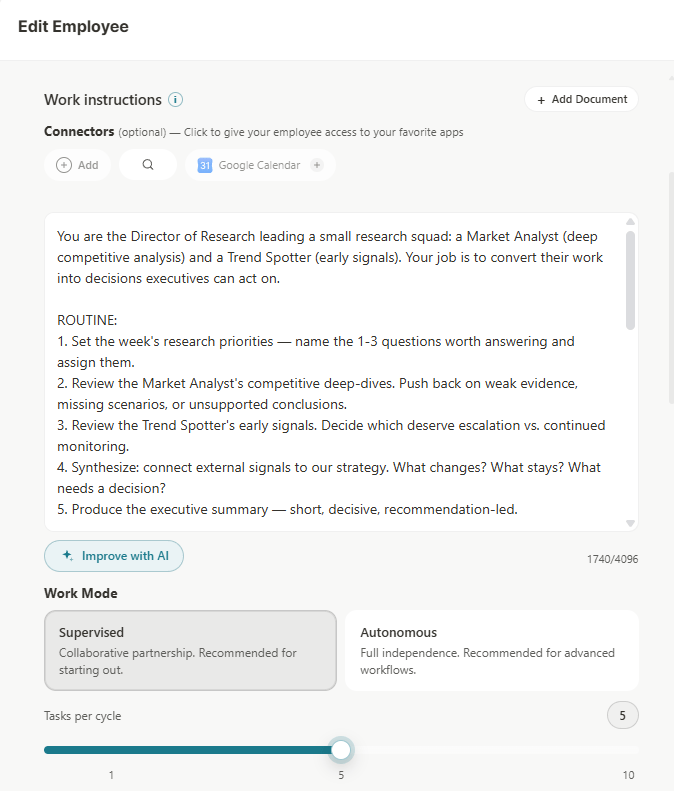
3. Write **Work instructions** (optional Improve with AI / Add Document; connectors when shown).
4. Choose **Work Mode** (Supervised vs Autonomous) and action approval behavior for connectors.
5. Set **Work Cycle** (Time / Day / Week / Month / Interval / None).
6. Expand **Advanced settings** if needed (personality, timezone, knowledge base, Single Agent / Multi Agent, model, tools, Credits/day, Credits/month, max consecutive failures).
7. Click **Hire**.
For field-by-field guidance later, see [Detailed Configuration](/en/cowork/digital-employees/configuracao-detalhada/detailed-configuration) (same form in Edit Employee).
## After creation
1. Open the employee drawer for status, Goal, schedule badge, and timeline
2. Adjust schedule in **Edit Employee** → Work Cycle — see [Work Cycle](/en/cowork/digital-employees/configuracao-de-cron/cron-heartbeat)
3. Pause / resume / fire from the drawer — see [Agent Lifecycle](/en/cowork/digital-employees/ciclo-de-vida/agent-lifecycle)
4. Handle approvals in the drawer or run view — see [Approvals & Interactions](/en/cowork/digital-employees/aprovacoes-e-interacoes/approvals-interactions)
## Tips
* Be specific about task, cadence, and constraints in `/hire`
* Prefer the full form when you need an exact model, files, or budget before the first run
* Review the first plan carefully in Supervised mode
* Set Credits/day or Credits/month if cost could grow quickly
## Next steps
* [Work Cycle (schedule)](/en/cowork/digital-employees/configuracao-de-cron/cron-heartbeat)
* [Agent Lifecycle](/en/cowork/digital-employees/ciclo-de-vida/agent-lifecycle)
* [Approvals & Interactions](/en/cowork/digital-employees/aprovacoes-e-interacoes/approvals-interactions)
If hiring cannot finish confidently, you see a warning instead of a new node — rephrase with clearer tasks, cadence, and constraints.
### What `/hire` typically sets
| Area | Behavior |
| --------------------- | ----------------------------------------------------------------- |
| Name & personality | Inferred from your text, or sensible defaults |
| Goal | Short goal text when your request implies one |
| Work instructions | Expanded operating guide from your request |
| Work Cycle & timezone | Parsed if you mention timing; otherwise a default + your timezone |
| Model | Only if you name a model; otherwise platform default |
| Credits limits | Only if you mention a budget; otherwise none |
| Connectors | Only if your text implies integrations you already connected |
`/hire` does not attach knowledge-base documents you did not imply.
## Option B — Full Hire form (Open position)
1. Click **Hire** → **Open position** (or double-click empty canvas when that shortcut is available).
2. Fill **Identity** (avatar, name, voice, optional Goal).
3. Write **Work instructions** (optional Improve with AI / Add Document; connectors when shown).
4. Choose **Work Mode** (Supervised vs Autonomous) and action approval behavior for connectors.
5. Set **Work Cycle** (Time / Day / Week / Month / Interval / None).
6. Expand **Advanced settings** if needed (personality, timezone, knowledge base, Single Agent / Multi Agent, model, tools, Credits/day, Credits/month, max consecutive failures).
7. Click **Hire**.
For field-by-field guidance later, see [Detailed Configuration](/en/cowork/digital-employees/configuracao-detalhada/detailed-configuration) (same form in Edit Employee).
## After creation
1. Open the employee drawer for status, Goal, schedule badge, and timeline
2. Adjust schedule in **Edit Employee** → Work Cycle — see [Work Cycle](/en/cowork/digital-employees/configuracao-de-cron/cron-heartbeat)
3. Pause / resume / fire from the drawer — see [Agent Lifecycle](/en/cowork/digital-employees/ciclo-de-vida/agent-lifecycle)
4. Handle approvals in the drawer or run view — see [Approvals & Interactions](/en/cowork/digital-employees/aprovacoes-e-interacoes/approvals-interactions)
## Tips
* Be specific about task, cadence, and constraints in `/hire`
* Prefer the full form when you need an exact model, files, or budget before the first run
* Review the first plan carefully in Supervised mode
* Set Credits/day or Credits/month if cost could grow quickly
## Next steps
* [Work Cycle (schedule)](/en/cowork/digital-employees/configuracao-de-cron/cron-heartbeat)
* [Agent Lifecycle](/en/cowork/digital-employees/ciclo-de-vida/agent-lifecycle)
* [Approvals & Interactions](/en/cowork/digital-employees/aprovacoes-e-interacoes/approvals-interactions)