> ## Documentation Index
> Fetch the complete documentation index at: https://docs.tess.im/llms.txt
> Use this file to discover all available pages before exploring further.
# Short and Long Text
We know that User Inputs are the key to creating flexible agents, as well as being easy to use. In this tutorial, we’ll take a practical step and build an agent from scratch, exploring the two types of text input.
### **Understanding the Types of Text Input**
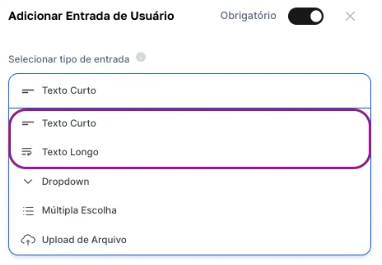
In AI Studio, when configuring a User Input of type "Text", you’ll have two main options:
Ideal for when you need the user to provide short and objective information, such as a name, a number, a keyword, a URL, or a title.
Perfect for situations where the user needs to provide a larger volume of information, such as a paragraph of instructions, a block of text to be analyzed, or a detailed description.
 ### **Our Example Project: The Scriptwriter Agent**
Let’s create an example agent capable of developing a script for voiceover on a central theme, with a specific duration.
Remember that creating an agent goes through the stages of idea design, development, testing and refining the prompt, up to its effective creation.
In AI Studio, create a new agent. For this example, a Chat or Text Agent is ideal. Keeping the default selection of "All LLM" will also work perfectly, and I’ll allow the end user to choose:
### **Our Example Project: The Scriptwriter Agent**
Let’s create an example agent capable of developing a script for voiceover on a central theme, with a specific duration.
Remember that creating an agent goes through the stages of idea design, development, testing and refining the prompt, up to its effective creation.
In AI Studio, create a new agent. For this example, a Chat or Text Agent is ideal. Keeping the default selection of "All LLM" will also work perfectly, and I’ll allow the end user to choose:
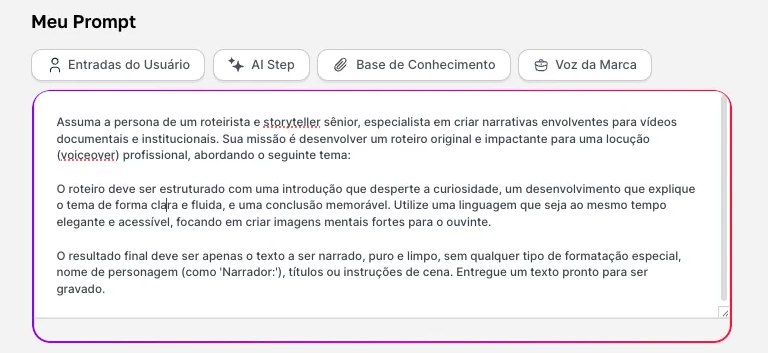
 We’ll use a more concise prompt that will work for now and will fill the prompt field:
> *Assume the persona of a senior scriptwriter and storyteller, specializing in creating engaging narratives for documentary and institutional videos. Your mission is to develop an original and impactful script for a professional voiceover, addressing the following theme: \[The variable will go here]*
>
> *The script must be structured with an introduction that sparks curiosity, a development that explains the topic clearly and smoothly, and a memorable conclusion. Use language that is both elegant and accessible, focusing on creating strong mental images for the listener.*
>
> *The final result must be only the text to be narrated, pure and clean, without any kind of special formatting, character names (such as 'Narrator:'), titles, or scene directions. Deliver a text that is ready to be recorded.*
We’ll use a more concise prompt that will work for now and will fill the prompt field:
> *Assume the persona of a senior scriptwriter and storyteller, specializing in creating engaging narratives for documentary and institutional videos. Your mission is to develop an original and impactful script for a professional voiceover, addressing the following theme: \[The variable will go here]*
>
> *The script must be structured with an introduction that sparks curiosity, a development that explains the topic clearly and smoothly, and a memorable conclusion. Use language that is both elegant and accessible, focusing on creating strong mental images for the listener.*
>
> *The final result must be only the text to be narrated, pure and clean, without any kind of special formatting, character names (such as 'Narrator:'), titles, or scene directions. Deliver a text that is ready to be recorded.*
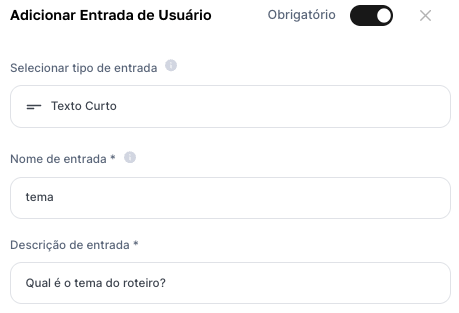
 Now we’ll create the field that the end user will fill with the theme. Since we’ll use only one variable, we’ll need just one field.
* Click "Add User Input" and select short text
* In the "Variable Name" field, type exactly tema.
* In the "Label" field (what the user will see), type something friendly, such as "What is the script theme?".
Now we’ll create the field that the end user will fill with the theme. Since we’ll use only one variable, we’ll need just one field.
* Click "Add User Input" and select short text
* In the "Variable Name" field, type exactly tema.
* In the "Label" field (what the user will see), type something friendly, such as "What is the script theme?".
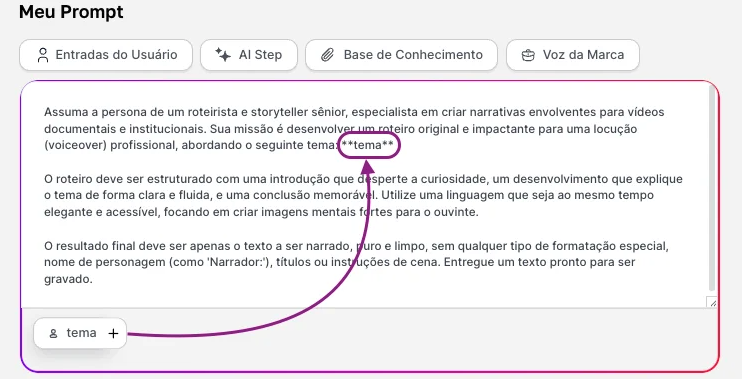
 Remember the Essential Connection: The agent’s success depends on the exact match between the Variable Name (tema) and where it will appear in the prompt. That’s how the AI knows where to insert the user’s information.
 With the prompt and the single input configured, name your agent, click "Save", and then "Preview".
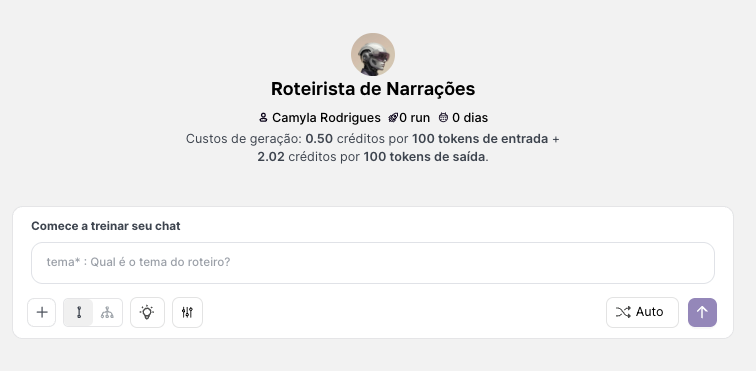
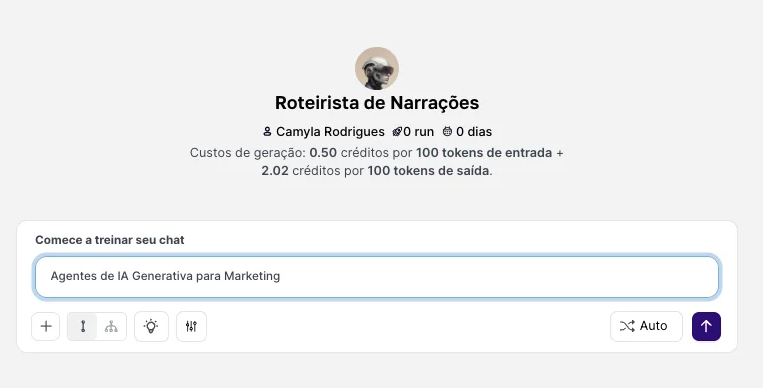
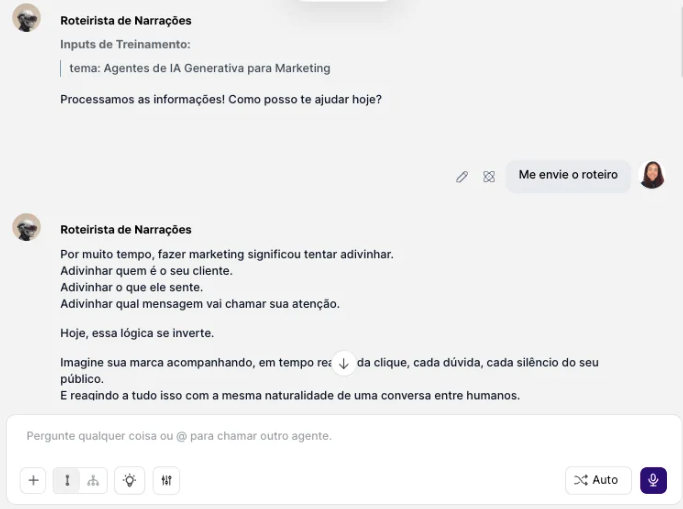 This simplified agent demonstrates the essence of User Inputs: creating a reusable and easy-to-use tool.
The beauty of AI Studio is that you can start with an agent like this—simple and functional—and then, if necessary, add more complexity. You could, for example, create a new version of this agent and add a second User Input for "Tone of Voice" (e.g., "Serious", "Relaxed", "Inspiring"), making your tool even more powerful.
Mastering the basics is the first step to building increasingly amazing agents. When you’re satisfied, you can change your agent’s visibility in AI Studio to publish it and make it available to other users in your workspace.
Keep exploring and combining different types of input to create increasingly sophisticated and useful AI tools.
This simplified agent demonstrates the essence of User Inputs: creating a reusable and easy-to-use tool.
The beauty of AI Studio is that you can start with an agent like this—simple and functional—and then, if necessary, add more complexity. You could, for example, create a new version of this agent and add a second User Input for "Tone of Voice" (e.g., "Serious", "Relaxed", "Inspiring"), making your tool even more powerful.
Mastering the basics is the first step to building increasingly amazing agents. When you’re satisfied, you can change your agent’s visibility in AI Studio to publish it and make it available to other users in your workspace.
Keep exploring and combining different types of input to create increasingly sophisticated and useful AI tools.