> ## Documentation Index
> Fetch the complete documentation index at: https://docs.tess.im/llms.txt
> Use this file to discover all available pages before exploring further.
# Video Generator
If an image is worth a thousand words, a video can tell an entire story. With Tess AI’s Video Generator, you create moving clips from a text description (prompt) or even from a reference image (depending on the model chosen).
It’s ideal for marketing, social media, product demos, educational content, and creative experimentation.
### **You can generate videos in three ways in Tess AI:**
For this path, in the left side menu we access Agent Studio and then the Video Generator.
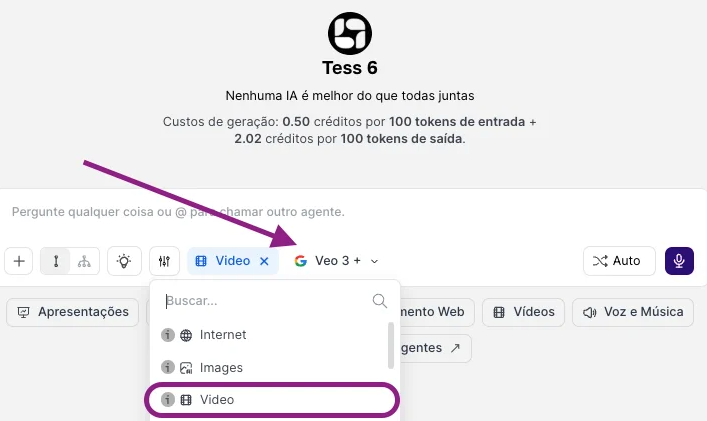
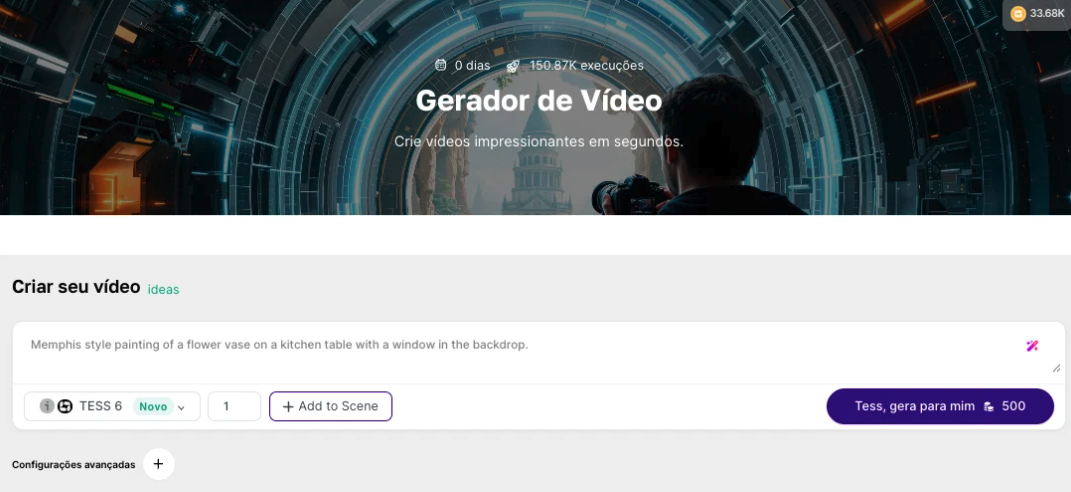 This is the fastest way to turn an idea into a video without leaving the conversation.
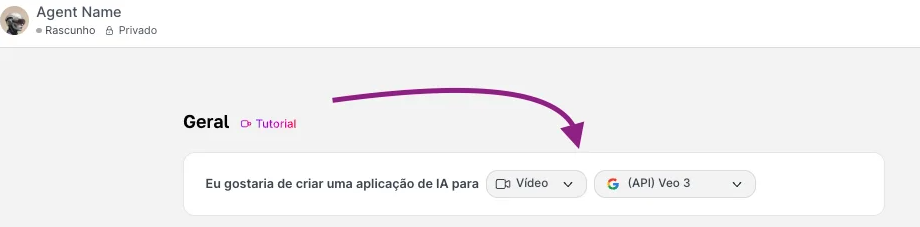
 If you need to maintain consistency (same style, format, and guidelines), create a specialized agent.
 ### **What the Video Generator is and how to use it**
In this article, we’ll focus on generating videos through the Generator, whose interface will act as your “production studio” inside Tess AI. It uses AI models capable of interpreting your instructions and creating moving scenes — usually as short clips, ready for you to download and use.
To work with video generation, pay attention to the prompt, the chosen model, and the settings available in each model.
Describe the scene (the prompt). Here, you should think in terms of movement and action (not just “what the image looks like”). So include elements such as:
* Subject: who or what appears
* Action: what is happening. Use verbs (movement is everything): "running", "spinning", "floating", "flying over", "cutting", "approaching", "the camera follows", "the camera moves closer", "the camera passes through"
* Environment: where the scene takes place
* Style: realistic, animation, cinematic, etc.
* Camera: angle and camera movement
Prompt examples (good)
1. "A golden retriever running in slow motion on a sunny beach at sunset, gentle waves in the background, cinematic style."
2. "Close-up of hands typing on a mechanical keyboard, blue and purple neon light, shifting focus, slight handheld camera, vlog style."
3. "Aerial tracking shot over a dense, foggy forest at dawn; sunbeams cut through the mist and reveal a winding river below."
**Tip:** You can improve your prompt with Magic Prompt; it enhances and translates your command to make it even better!
### **What the Video Generator is and how to use it**
In this article, we’ll focus on generating videos through the Generator, whose interface will act as your “production studio” inside Tess AI. It uses AI models capable of interpreting your instructions and creating moving scenes — usually as short clips, ready for you to download and use.
To work with video generation, pay attention to the prompt, the chosen model, and the settings available in each model.
Describe the scene (the prompt). Here, you should think in terms of movement and action (not just “what the image looks like”). So include elements such as:
* Subject: who or what appears
* Action: what is happening. Use verbs (movement is everything): "running", "spinning", "floating", "flying over", "cutting", "approaching", "the camera follows", "the camera moves closer", "the camera passes through"
* Environment: where the scene takes place
* Style: realistic, animation, cinematic, etc.
* Camera: angle and camera movement
Prompt examples (good)
1. "A golden retriever running in slow motion on a sunny beach at sunset, gentle waves in the background, cinematic style."
2. "Close-up of hands typing on a mechanical keyboard, blue and purple neon light, shifting focus, slight handheld camera, vlog style."
3. "Aerial tracking shot over a dense, foggy forest at dawn; sunbeams cut through the mist and reveal a winding river below."
**Tip:** You can improve your prompt with Magic Prompt; it enhances and translates your command to make it even better!
 In addition, you can use the + Add to Scene feature to include visual and motion elements in your prompt.
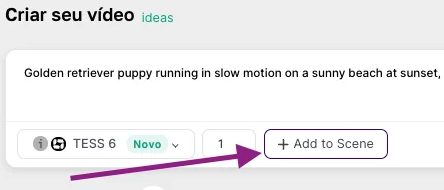 You can choose the elements you want and, at the end, add them to the prompt:
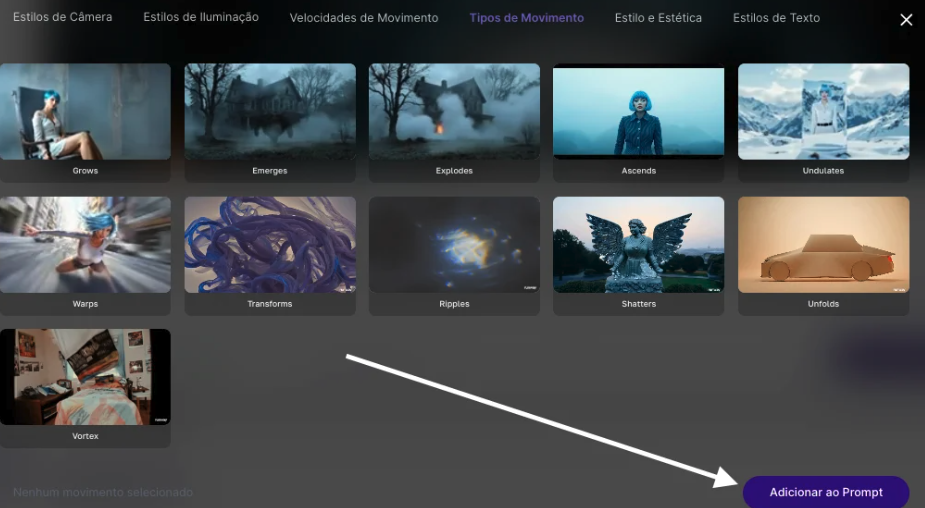 After the prompt, it’s important to choose a video model that will be responsible for generating your animation, motion, or bringing your video to life. In Tess AI, we have a list of several available models. To find one, you can type its name or scroll down:
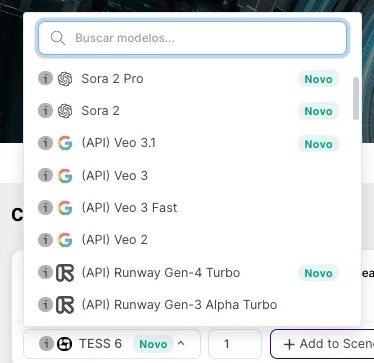 Each model has its own characteristics: some allow reference images, others don’t, and some work from videos. The best way to find out which works best for you is by experimenting or opening each model’s specifications on official release pages.
Depending on the selected model, you can adjust items such as:
* Video aspect ratio (e.g., 9:16 vertical for Reels/TikTok, 16:9 for YouTube)
* Duration (short clips)
* Style/quality (when options are available)
* Variations (generate more than one option)
### Done!
After you send the prompt, Tess processes it and returns the clip. The cost to generate each video, according to the chosen model, will appear next to the generation button:
Each model has its own characteristics: some allow reference images, others don’t, and some work from videos. The best way to find out which works best for you is by experimenting or opening each model’s specifications on official release pages.
Depending on the selected model, you can adjust items such as:
* Video aspect ratio (e.g., 9:16 vertical for Reels/TikTok, 16:9 for YouTube)
* Duration (short clips)
* Style/quality (when options are available)
* Variations (generate more than one option)
### Done!
After you send the prompt, Tess processes it and returns the clip. The cost to generate each video, according to the chosen model, will appear next to the generation button:
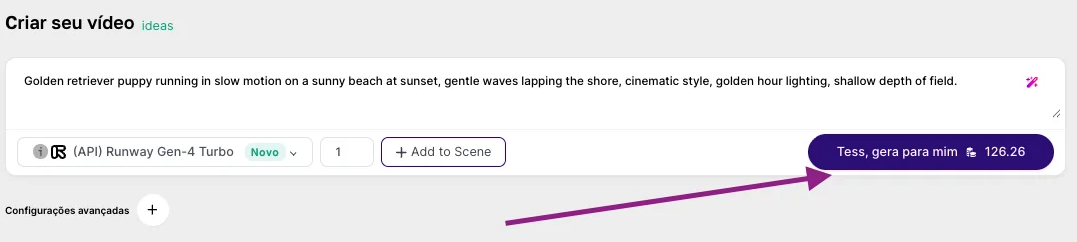 **IMPORTANT!**
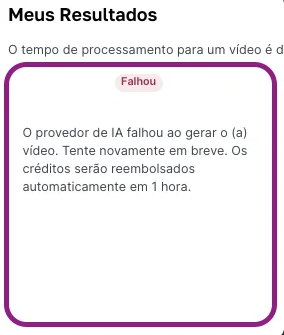
Since we trigger the model to generate your video, if there is any intermittency or error in the model provider’s API, the process may exceptionally fail. This is very rare, but possible. If your video is not generated, don’t worry—credits will be returned to your wallet within up to 1 hour.
Either way, it’s important to check if there was something in the process, on the user’s side, that may have caused the failure, such as:
* Prompt length: avoid prompts over 500 characters
* Reference image: check the format you sent and what the model supports
**IMPORTANT!**
Since we trigger the model to generate your video, if there is any intermittency or error in the model provider’s API, the process may exceptionally fail. This is very rare, but possible. If your video is not generated, don’t worry—credits will be returned to your wallet within up to 1 hour.
Either way, it’s important to check if there was something in the process, on the user’s side, that may have caused the failure, such as:
* Prompt length: avoid prompts over 500 characters
* Reference image: check the format you sent and what the model supports
 Tess AI’s Video Generator boosts dynamic content creation: you go from idea to a finished clip in minutes. Start simple, refine the prompt, and if the usage is recurring and within the same patterns, create a Video Agent to keep consistency and gain scale.