How to Set Up a User Input
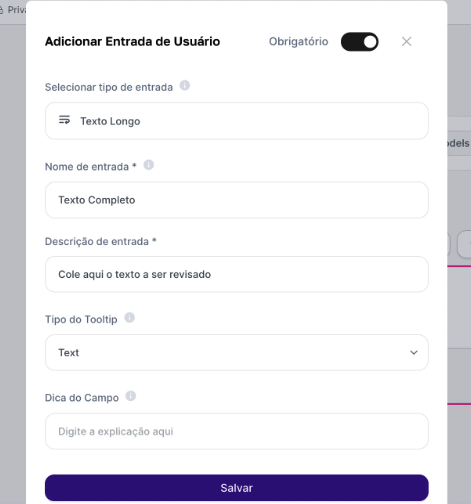
Before we explore the input types, the process for adding them is always the same and happens in your agent’s configuration panel. There you’ll see the “User Input” option—click it to create a new input field.Type
The input format the user will fill out (text, list, file, etc.).
Name
The variable’s internal name, which will be used in the instruction (prompt). Use short names, without accents or special characters.
Description
The text that will be shown to the end user, guiding them on how to fill it in.
Exploring the Input Types
Now, let’s detail each of the input types you can configure.- Short Text
- Long Text
- Dropdown
- Multiple Choice
- File Upload
Ideal for collecting brief and direct information. Use this field when the user needs to fill in a word, a phrase, or a specific piece of data.What it’s for: Collecting names, emails, order numbers, search terms, document titles, etc.
Usage example: You can create an agent that generates personalized greetings. The Client Name variable (Short Text) would ask for the client’s name: And the instruction would be: “Create a friendly greeting for client-name”