Workspace
Available only to members of your workspace. This is the ideal mode to keep control of internal agents.
Private
Visible only to you (and, if applicable, authorized workspace administrators).
Public
Available for use by the entire Tess user community and is listed in the Marketplace.
Unlisted
It doesn’t appear in the Marketplace, but anyone in Tess who receives the link can access it.
Why is it important?
- Security and confidentiality: agents with sensitive data should be private or limited to the workspace.
- Controlled sharing: experimental agents can be unlisted, accessible only via link.
- Distribution and community: mature agents can be made public and shared with the entire Tess user base.
Understanding Visibility Levels in detail
Workspace
All workspace members can access the agent. It’s great for agents created by company members so other colleagues can use them.
Private
Only the agent creator can see it. Used for draft agents, tests, or personal agents.
Public
In this case, any Tess user can find and use the agent, and it becomes available and listed in the Marketplace. Used for agents ready to be reused by others (more generic and broad), market templates, showcases, etc.
Unlisted
It can’t be found in the Marketplace, and only people with the direct link can open it. It’s used when you want to share with specific clients, partners, or in beta phases for testing by other people.
How to adjust an agent’s visibility
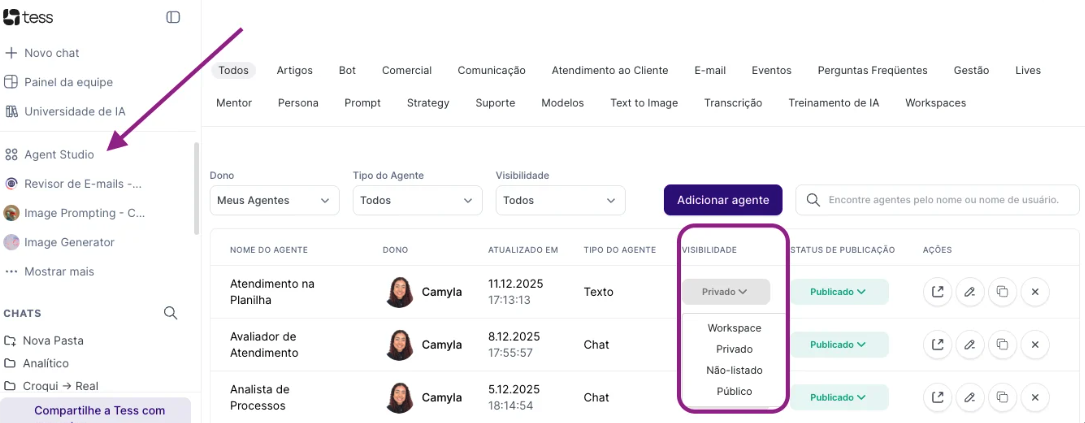
When creating the Agent, you can set visibility inside Agent Studio by selecting your preferred option. The agent will be created with that setting.- Open Agent Studio
- Find the agent you want to configure. You can use the search field, type, visibility, or Owner.
- Check the Visibility column and choose the desired level
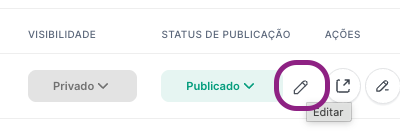
**\
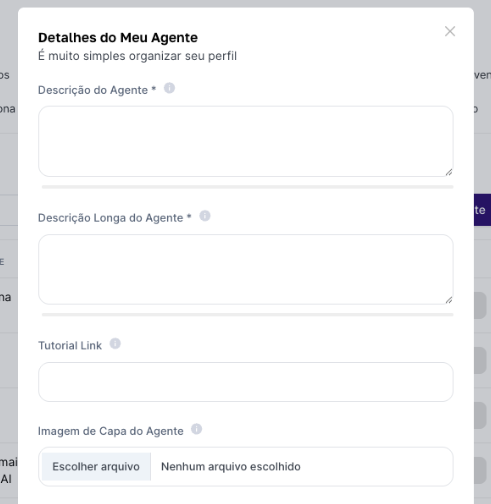
Detailed Agent information (to make it public)** To access it, just hover next to the status and click the pencil.