This intermediate-level tutorial assumes you’re already familiar with basic agent creation and will focus on the powerful combination of file inputs with Advanced Steps.
The Key Point: The Connection Between File Upload + Advanced Step
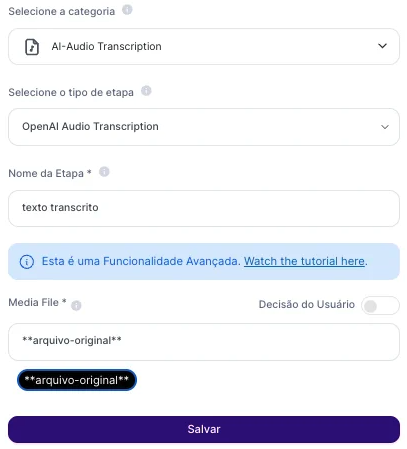
Unlike a text input, which can be used directly in the prompt (or in the step), “File Upload” needs to connect to an Advanced Step. The workflow is a logical two-step sequence:- The user uploads a file (through the User Input).
- An Advanced Step (such as “Audio Transcription” or “PDF Text Extraction”) processes that file and generates a result (text, for example).
- The result of the Advanced Step is then used by the AI in the main prompt to generate the final response.
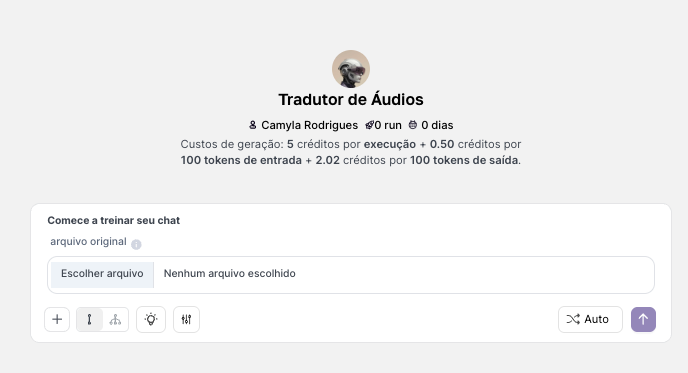
Initial Agent Setup
In AI Studio, start by creating a new Chat or Text Agent. The default “All LLM” selection is perfectly suitable for this example.
Configuring the Input and the Advanced Step
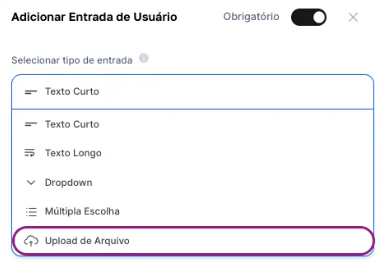
This is the most important stage. We’ll configure the two parts that will work together.In “User Inputs”, add a new “File Upload” input with the variable: arquivo original. For the label, use: “Send your audio or video file”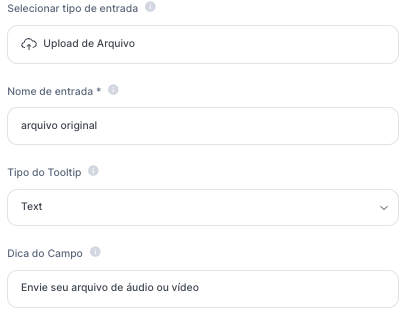
Developing the Main Prompt
Now, we’ll tell the AI what to do with the text extracted by the Advanced Step. In the prompt field, we have: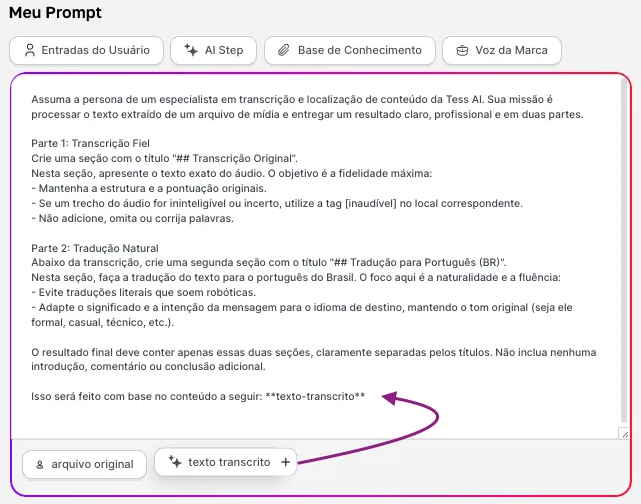
Assume the persona of a Tess AI expert in transcription and content localization. Your mission is to process the text extracted from a media file and deliver a clear, professional result in two parts. Part 1: Faithful Transcription Create a section titled ”## Original Transcription”.
In this section, present the exact text from the audio. The goal is maximum fidelity:
- Keep the original structure and punctuation.
- If a segment of the audio is unintelligible or uncertain, use the [inaudible] tag in the corresponding spot.
- Do not add, omit, or correct words. Part 2: Natural Translation Below the transcription, create a second section titled ”## Translation to Portuguese (BR)”.
In this section, translate the text into Brazilian Portuguese. The focus here is naturalness and fluency:
- Avoid literal translations that sound robotic.
- Adapt the meaning and intent of the message to the target language, keeping the original tone (whether formal, casual, technical, etc.). The final result must contain only these two sections, clearly separated by the titles. Do not include any introduction, commentary, or additional conclusion. This will be done based on the following content: transcribed-text
Saving and Testing
Click “Save” and then “Preview”. You’ll see an interface with a file upload button. Upload a short audio or video (200mb file size limit) in another language and let the agent handle the rest!