Defining the Fields to Configure the Agent
Spreadsheet for Analysis
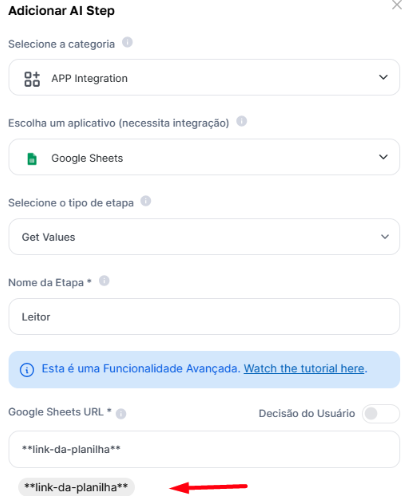
The first thing to do is select your spreadsheet for data analysis and processing.As a first step, inside Agent Studio, we’ll create an advanced “App Integration” step with the reference spreadsheet URL and the data reading range. As shown in the screenshot, we’ll name the step Reader and select “Get Values”, since we want to retrieve the data.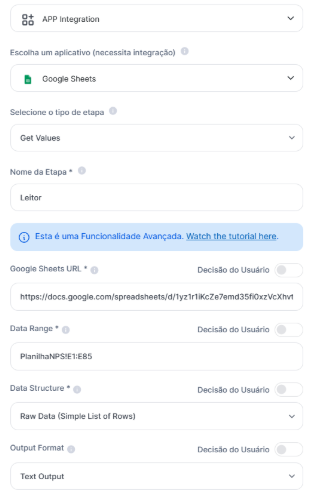
Processing what will be inserted
Before modifying the spreadsheet, we need to process and analyze what comes from the spreadsheet and the selected data range — meaning we need to use an assistant that will evaluate and recommend the actions you as a user want, right?
Based on the example above, we’ll select the AI Assistant Step and choose the Chat GPT Text Assistant, as shown in the screenshot below. Note that inside the assistant, we already have a ready-made prompt with what we want to execute — meaning I’m already directing the ChatGPT assistant on what I want it to do.
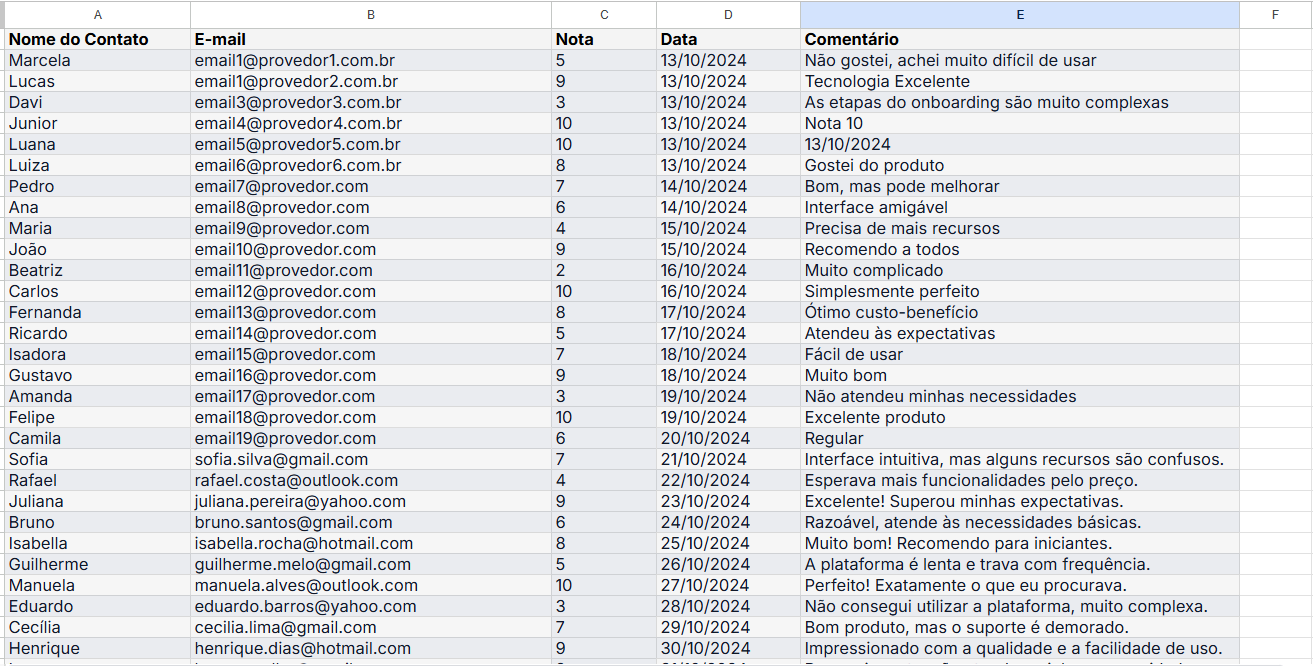
Here’s an example of a survey where we want to analyze customer comments and summarize each comment in one word, as in the example below
| Comment | Summary |
|---|---|
| I didn’t like it, I found it very difficult to use | Difficult |
| Excellent technology | Excellent |
| The onboarding steps are very complex | Complex |
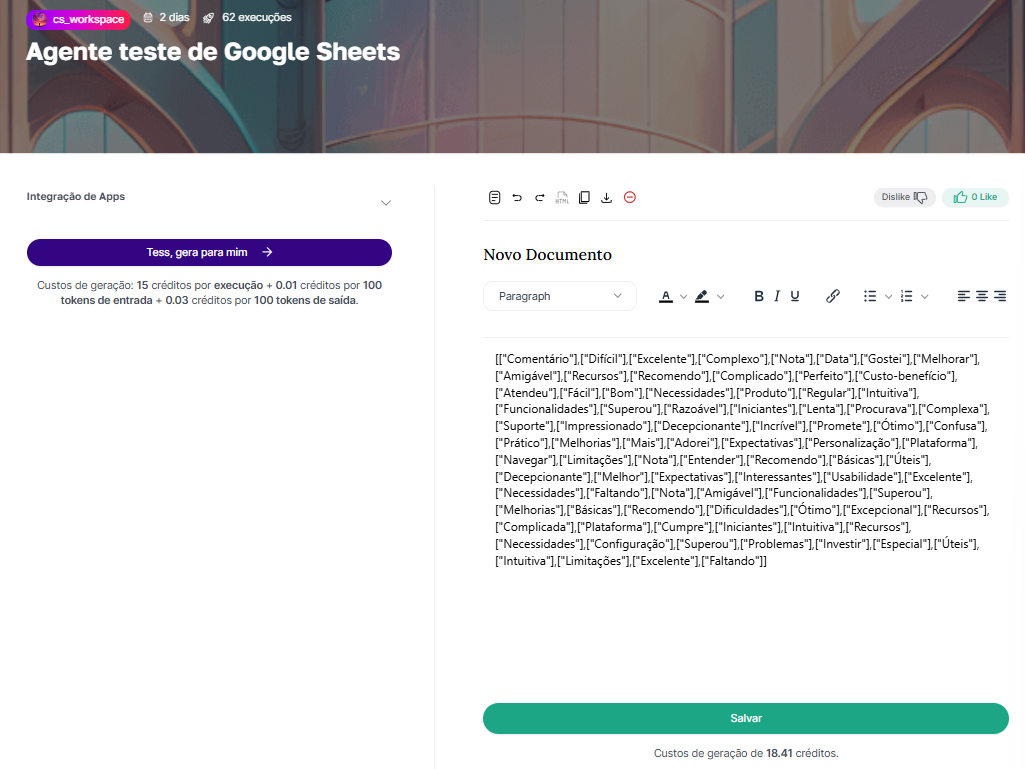
Below you’ll find a table, each cell containing a message. I need you to create a new table, without markdown, bringing one word that summarizes each message. That is, each new row will have one word.Of course, I need to reference the spreadsheet I added. That’s why I highlight the reference to Leitor, the first step I added which holds the spreadsheet and its data range, and I’ll also bring exactly the data format I want the spreadsheet to return.In summary, what have we done so far?
Please bring only the table, without markdown, and nothing else. Respect the formatting: [[“Col1”, “Col2”], [“Data1”, “Data2”]]
#messages
**leitor**
- We added the analysis spreadsheet (Creating the Reader using the App Integration Step and selecting Get Values, to retrieve the values)
- We chose the data range for analysis (Creating the Reader using the App Integration Step)
- We decided we want to process the data (Creating the Processing Step using the AI Assistant)
- We decided how the processing will be done through a prompt that references the analysis spreadsheet (Defining the Processing Step using the AI Assistant)
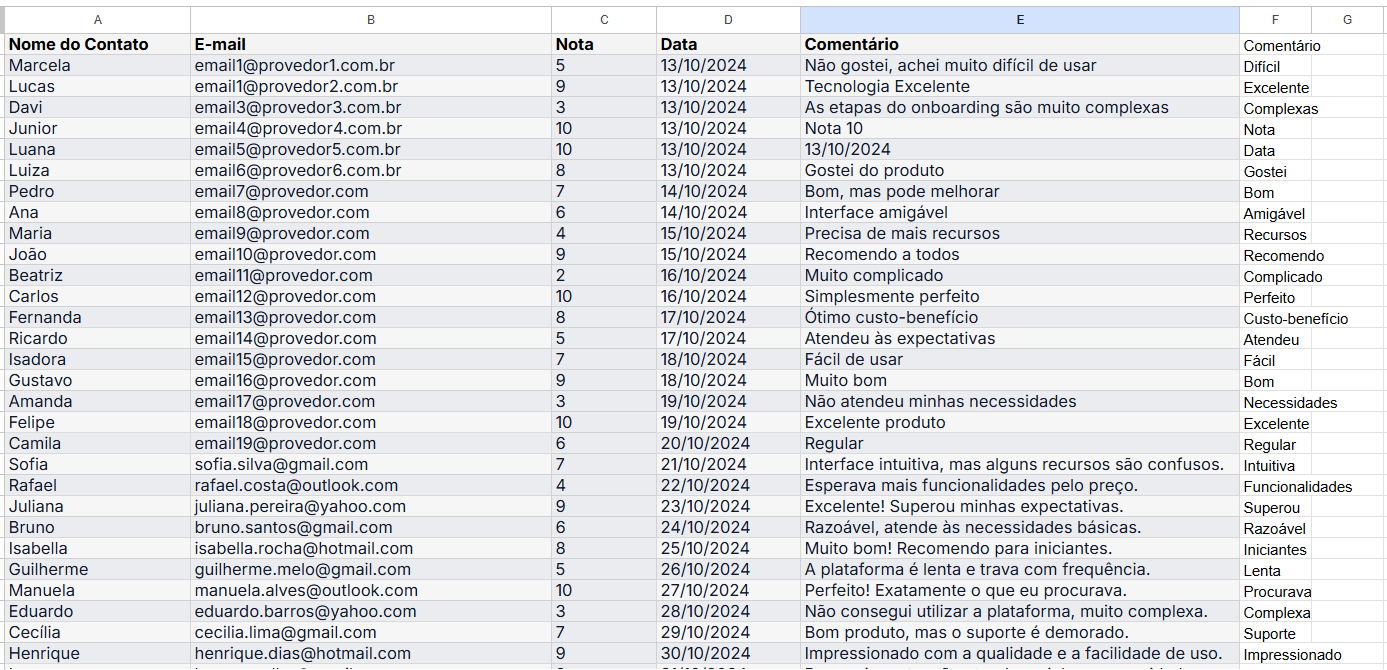
Writing what we want to the spreadsheet
Now comes the easiest part. We’ve already read and processed the data — we just need to write it.So let’s create a new advanced “App Integration” step with the reference spreadsheet URL and the data range. But unlike field 1, we’ll name this step Writer and select “Write Values”, since we want to write the data, not retrieve it!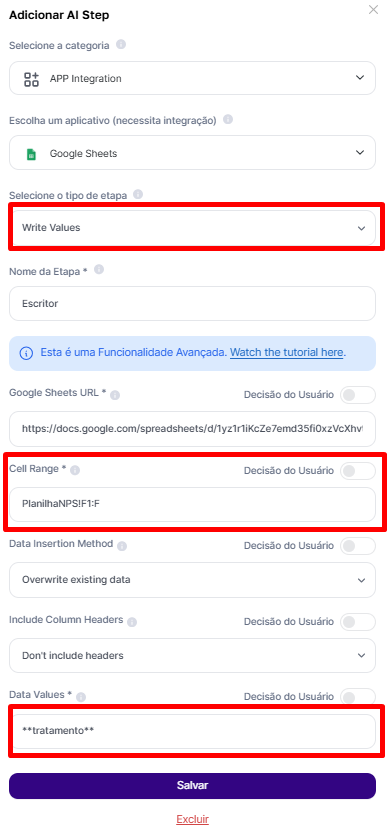
- Write range: I need to select which column or space the processed data will be written to. Since in the reading I have the data in column “E” and those are the ones I’ll process, I’ll write to column “F”, right next to it;
-
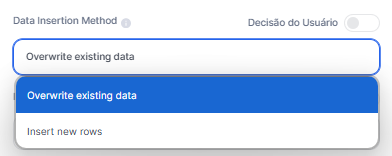
Data insertion method: I can choose between overwriting the data in the selected range (as shown in the screenshot above) or creating new rows to avoid overwriting.
- Include headers or not: I can also choose whether or not headers should be taken into account.
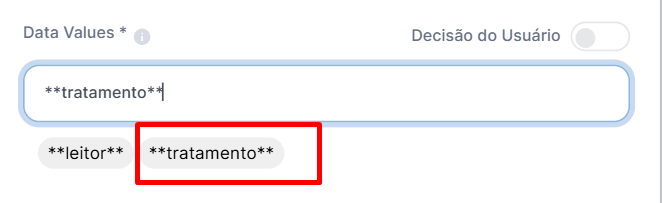
- Data values to be inserted: as a final decision, I need to select what will be inserted in column F (my selection). Of course, I want the processed data to be that. And since I already have this Step ready — it was exactly my processing step — I just reference it.
Everything can also be a user decision, ok? In this case, since we’re working based on the spreadsheet, we set everything up in advance, but feel free to customize it!
Finalizing the Agent
To finalize the Agent, I just need to finish it with a desired prompt. In this case, since I already have everything I need, I’ll set it up as a text Agent without the need for applied AI, simply returning the comments summarized in one word. After all, everything is already ready in the AI Steps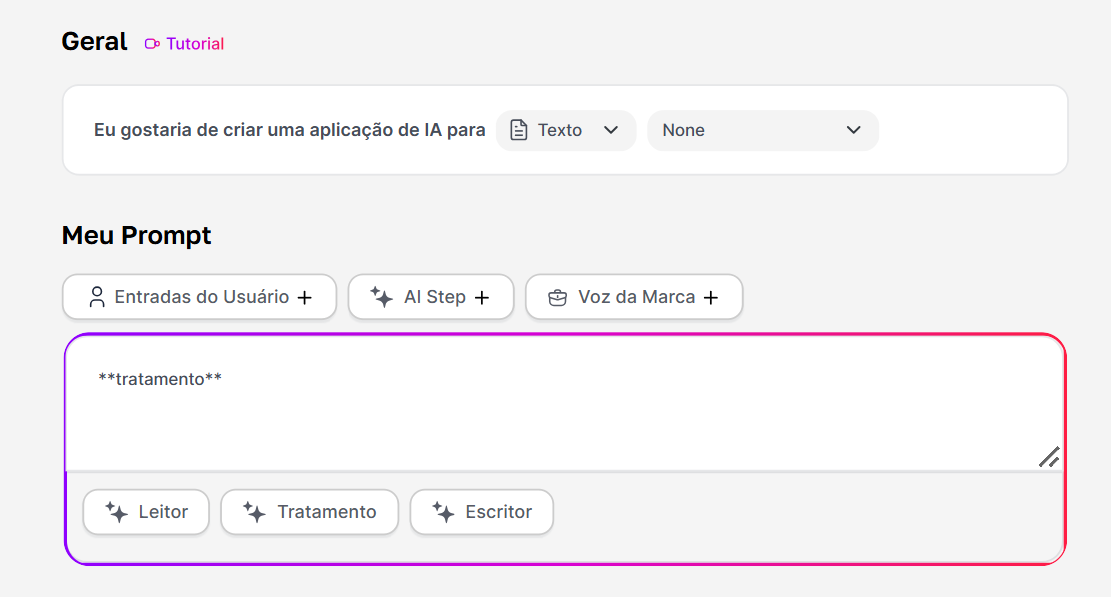
Results
Simply put, here is the result after requesting a generation. Before